Wednesday, August 31, 2016

Warm Fuzzies

Happy hump day!

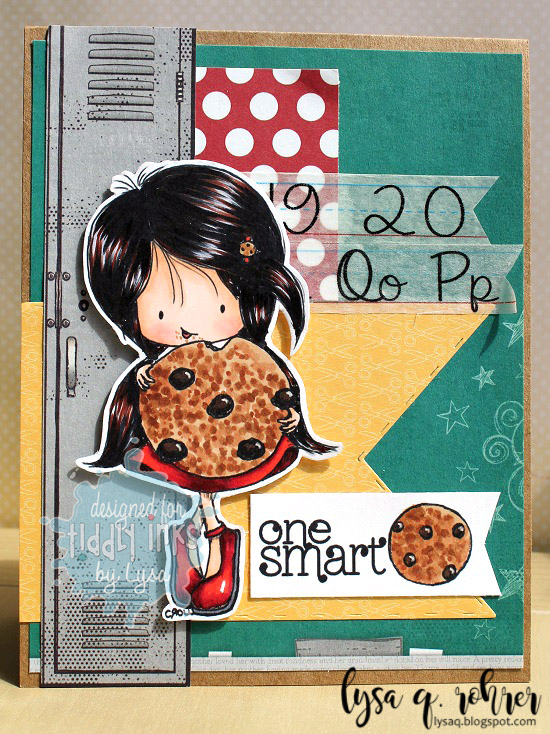
I'm on the LDRS Creative blog today, sharing another Saturated Canary image, Crafty Cat!

Crafty Cat

I had so much fun putting this one together- I'm a big fan of layers and this one has plenty!

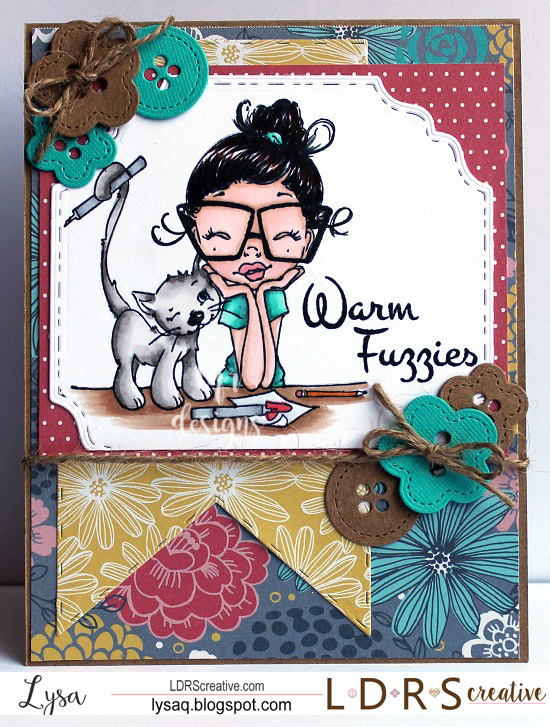
My stamped image was die cut using Fancy Squares and Little Things, but since I had stamped and colored this awhile ago- it was too close to the bottom of the page to fit the full square die, so a bit of the bottom is cut off! The sentiment is from the Summer Fun sentiment set, I mounted that on a coordinating patterned paper, then die cut the yellow flag using the Stitched Banner die to place under that layer. Added all of that onto the card base and finished it off by tying the button dies from the Fancy Squares and Little Things die set with some jute twine.

Copics:
skin: E000, E50, E21, R00
hair: E29, C7, C9
shirt: BG11, BG13, BG15, BG18
cat: W0, W1, W3, W5
table: E31, E33
pencil/markers: Y38, N1, N3, R14


Thanks for stopping by!

Saturday, August 27, 2016

Sparkle Where Ever You Go...

Happy Weekend!

I'm on the Passionate Paper Creations blog today sharing another Art by Miran image... and continuing the fun over on the PPCF Facebook page with a coloring contest using Asteria- AND she's only $1.50 this weekend!

Sparkle

I just loved the sentiment from the Amazing Girls sentiment sent from LDRS Creative and die cut the flag banner from Creative Basics. I kept the rest of the details on my card to let the image shine.. or should SPARKLE! I added a sheet of glitter card stock, a light pink doily, and some clear sequins to finish it off!

Copics:
skin: E000, E00, E21, R01
eyes: G20, G21
hair: E25, E27, E29, YR23
dress: BG10, BG11, BG13, BG15, BG18
background: RV00, RV02, C1, C3 

Thanks for stopping by.. hope to see you over in the PPCF Facebook Group!

Friday, August 26, 2016

Hello...

Friday!

Anyone else excited for Friday??

It's going to be fun weekend over on the Passionate Paper Creations & Friends Facebook group... sponsored by Art by Miran! You'll want to come join the group if you haven't already... there's contests, discounts and more all weekend long!

My first card I made is using this sweet Pencil Penny image.

Writing Hello...

Since she's a digi I was able to flip her to face the opposite direction to make her look like she was "writing" the sentiment. (alpha letters by Concord & 9th) To add more dimension and texture to my card, I embossed the card base with one of the Picnic embossing folders, some fluttering butterflies, and a Basic Stitched flag all by Creative Basics.

Copics:
skin:E000, E00, E21, R01
eyes: E35, G20, G21
hair: E74, E77, E79, T9
dress: BV02, BV13, BV17, C1, C3, C5
pencil: Y32, Y35, Y38, R22, R32, C3, T9

Hope to see you over on the PPCF Facebook group and join in on the fun!

Thursday, August 25, 2016

Heart Balloon Girl

I'm excited to share that I'm guest designing with Time for Tea Designs for a few months!

Popping in quick to share my card I made using a new August release digi- Heart Balloon Girl!&nbsp

Hello Balloon

She was so much fun to color! Especially since I matched her with these bright colored patterned papers from my stash for the August challenge- Colors of Summer!

Thanks for stopping by!

Tuesday, August 23, 2016

Smart Cookie!

Happy Tuesday!

Here in my neck of the blog-world school has already begun. Thankfully- not for my kids (yet) I'll be a wreck next fall when my son starts Kindergarten!

So... this week's new Tiddly Inks challenge is... BACK TO SCHOOL!

Smart Cookie

I found some super cute cursive handwriting and number washi tape at the dollar spot at Target, and paired it with some school themed patterned paper from my 6x6 pads stash. The yellow flag is from my new favorite die cut from Creative Basics, Basic Stitched Flags. The sentiment comes as part of the Wryn digi set.

Hope you are all ready for Back to School where you are... and hope to see you squeeze in some time to play along!

Wednesday, August 17, 2016

Sending hugs

Sympathy cards are such difficult cards to make, but a close friend recently lost a family member, and I wanted to make her and her mom cards to send my condolences.

I paired the flower from the Shine Brighter stamp set by Concord & 9th with a sentiment from Neat & Tangled's Better Together stamp...

Sending Hugs

I stamped and masked the flower to create a bundle, added the leaves and colored using Copic markers. I kept the card very simple by embossing the card base and adding a small strip of patterned paper.

The second card I made for my friend's mom...

Sympathy

I used a background cling stamp I had hiding in my stash by Hero Arts, Flowing flowers and Leaves (sorry I can't find it available). I stamped it in white pigment ink (Hero Arts, Unicorn),  and using fantastix coloring tools with other pigment inks (Memento Luxe: Love Letter, Pear Tart, ) I colored on top of the white flowers and leaves. I stamped the  'sympathy' using another set from Concord & 9th- Sophisticated Script, I love this set- it makes it easy to look like I wrote calligraphy!

Thanks for stopping by.. I'll be back tomorrow with another card to share!

Tuesday, August 16, 2016

Little Super Hero

Hello!

I'm over on the LDRS Creative blog today with my first official post since joining the design team! (not including my July release post! *wink wink*) For those new to LDRS Creative (like I was) they carry some amazing lines of stamps, dies, & embossing folders.

I decided to go with the Saturated Canary Little Super Hero stamp that I had colored a little while ago during the 30 Day Coloring Challenge.

Little Super Hero

I colored her using my trusty copics in one of my favorite color combinations- red, aqua and gray. I went digging through my 6x6 paper pads to find some coordinating patterns. I layered her on top of 3 different dies- on bottom is the largest Fancy Rectangles and Layers die, except I altered it a bit by trimming the center out to make it about 4" across. Next, I layered 2 the gray & aqua papers and used the largest Basic Stitched Flags die. But it was still missing something...

So on top of those layers I added the Gilded Doily Die in black and adhered the Superhero girl using foam tape. Finally, I stamped the sentiment from the Amazing Girls set on the square end of smaller Basic stitched flag to keep the stitching theme on everything.

Copics: 
Skin: E000, E21, E50, R01
Hair: 100, C1
Eyes: E31, E35
Shirt: R24, R29, R46, R59
Shorts: W3, W5, W7
Cape/shoes: BG10, BG11, BG13, BG15

Friday, August 12, 2016

I'm Dragon...

Happy Friday!

Yesterday when I popped onto Instagram and saw this super cute mug posted by Poppy & Mint Design, and since I'm still playing around with these Magical Dragons from My Favorite Things... I was totally inspired!

and BONUS! There's a Let's Go Wild Challenge going on at Simon Says Stamp Wednesday Challenge!

Enough chit chat.. here's my card!

I'm Dragon

Funny right? I was at Hobby Lobby the other day and scored that coffee cup embossing folder and the wood veneer coffee so the inspiration photo couldn't have been better timing!

Copics colors:
Dragon: R17, R37, R59, Y17, Y26, Y28

Thanks for stopping by!  Happy Weekend!!

Tuesday, August 9, 2016

Magical Dragons

(Second card for the day... please scroll down for my first!)

So I stayed up late last night working on this card with an idea that popped into my head... using the sketch from MFT Card Challenges


Edited and ready for my blog... only to start my post and realize I missed the deadline to enter! *insert face palm here* LOL!

BUT it's a good thing that I used the swatch from current Color Challenge too!


I don't have the exact colors, but used the closest matches in my stash. I used the super adorable Magical Dragons. I HAD to have them when I saw them in the newest release- ADORABLE! (& I have a bit of a soft spot for dragons since my son was born in the Year of the Dragon in the Chinese zodiac!)

Magical Dragon

I masked the little dragon to look like he's catching a ride on the back of the larger flying dragon! These guys were so much fun to color too- I did my best to give them a 'scaly' look! I finished it off by masking both of the dragons and stamping the small and large puffs of smoke in the set to look like clouds (and giving them a solid covering of glitter with my Spectrum Noir sparkle pen)!

Thanks for stopping by!


Waving Hello...

Hello!

Sorry I've been missing for a bit... the designers over at Tiddly Inks took a bit of a mini vacation & I used that time trying to get myself caught up and (somewhat) organized.. anyone else get lost while trying to clean and organize their craft areas?

Anyway, It's time for a new Tiddly Inks Challenge- and this one is perfect for summer! (not sure about any of you but we're still feeling the extreme heat here!) UNDER THE SEA!

If you follow me on Instagram, you would have noticed that I've had a bit of a mermaid obsession... and it all pretty much started during the 30 Day Coloring Challenge, because I started with coloring these cuties, Amy & Her Mini Mermaid Friends...

Mini Mermaid 1 Mini Mermaid 2 Mini Mermaid 3
Mini Mermaid 4 Mini Mermaid 5

So for this challenge, I thought it'd be a good idea to actually *USE* one of these on my card.  I decided to go with the second one and make a shaker card!

Under the Sea

This was so much fun to make! I had purchased seed beads awhile ago with the intent to make more shakers, and never got into it... THAT is about to change! Besides, I have plenty of mermaids to work with now :)

For my card, I used distress inks (salty ocean, seedless preserves, mermaid lagoon, peacock feathers) to create and under the sea looking background and frame. Splattered water drops for a fun effect,  mounted it to an embossed background, finished it off by adding a few sequins to the stop and adding the 'waving hello' sentiment (from The Greeting Farm).

Thanks for stopping by... hope to see you play along with us UNDER THE SEA!